Dog Arm Replacement & Adjustment
Share
DESCRIPTION
Changing out dog arms is a one-man job that takes less than five minutes per hatch to change out.
| Items needed to complete this job |
|
PROCEDURE
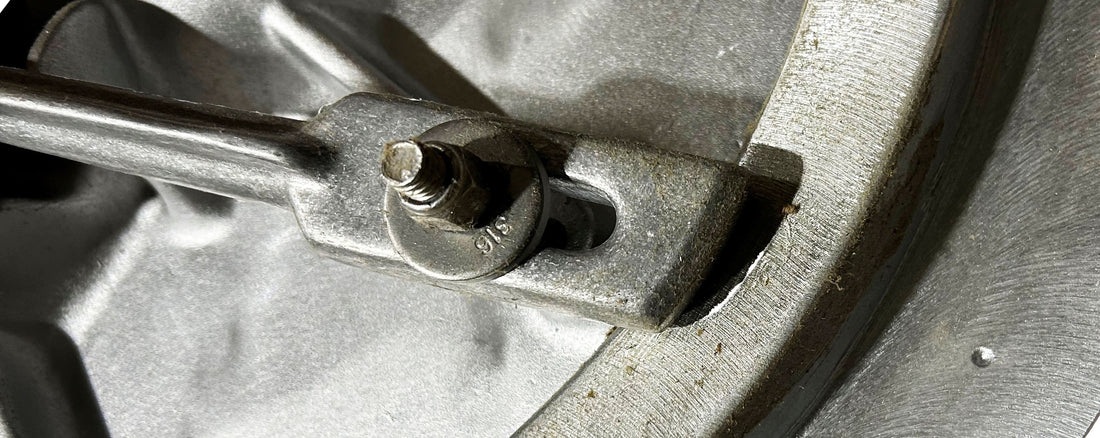
- Using a 9/16” wrench, remove the 3/8x16 nylock nut (item 1 in Figure 1) on the dog arm.
- Remove the stainless and nylon washer (items 2 and 3 in Figure 1)
- Lift the dog arm away from the cover until it clears the 3/8x16 mounting stud
- Rotate dog arm 90° in either direction, pull dog arm away from hub.
Installation is the reverse order of removal. *
*If your hatch is a 24x24 or your dog arms have scuff plates, then your dog arms are directional.
For 24x24 dogs you will notice there is a dip in the spine of the dog that needs to face the cover of the hatch.
If your dogs have scuff plates, the plate need to be facing the cover when installed.
ADJUSTMENT
To adjust the dog arms for proper seal you will need to perform a chalk test.
- Start with cleaning the knife edge and gasket surface. Do not clean gasket with solvents as it will break down the gasket material and cause it to become sticky and difficult to open in the future.
- Take a high visibility colored chalk (blue for example) and rub the chalk along the sealing edge, being certain that the edge is generously coated with chalk.
- Close and dog the hatch
- Open the hatch and inspect the gasket. The gasket should display a continuous chalk imprint on the gasket. The imprint is the result of the compressed contact between the coaming sealing surface and the gasket.
- A break in the chalk imprint indicates and ineffective seal. Adjust the dog arms by tightening or loosening the 3/8 nylock.
- Retest after adjusting. All dog arms should have even pressure. Like every stainless steel product, it needs to be maintained properly with the products that are available and especially made for this goal, i.e. stainless steel wax and special stainless steel cleaning agents.
ISO 755-02-96
REV 24FEB2021
